Login With Office 365 Account Using Microsoft Active Directory Authentication Library (MS ADAL) Plugin In Ionic 3
In this post we will be looking at how to use cordova and ms-adal Native plugin to authenticate into your Ionic mobile app.
We will build a simple app that allows users to login using their office 365 accounts. Once they login, a personalized welcome message will be displayed to the users using their profile information fetched via MS Graph API.
I decided to blog about my experience because I couldn't come across any comprehensive information on using MS ADAL authentication in Ionic unlike what you get for cordova Facebook and Google plugin. So, I hope this post will help someone.
The first thing to do is to register our app at https://apps.dev.microsoft.com.
Navigate to the url above and sign in with your Microsoft account, It could be a personal account or office account. It doesn't really matter. But if you want to see your apps in your azure dashboard, then use your office account.
Type MS Adal Demo in Application Name field
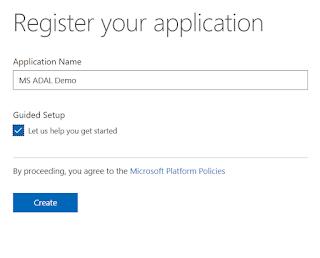 Ensure Guided Setup is selected, then click Create. The reason why we select guided setup is because we want the wizard to generate a custom redirect uri for our app. I had issue coming up with a redirect uri as I didn't know the format it should be, and I didn't come across any information on the internet that explains how that is done. So the saving grace for me was to use the wizard to generate a redirect uri for my app, and it worked fine. We are not going to follow the wizard all the way, we just want to get to a stage where the uri is generated and then skip.
When you click Create, you should see the page below, select Mobile and Desktop App
 This opens up sub-options, in the sub-options click Android

In the page that follows, click skip guided setup to go to your app page.
On the app page you should see the generated custom redirect uri in the Native Application section. Copy and save it somewhere, also copy and save the application Id. You can select Implicit flow if you wish, but ensure User.Read is selected under Microsoft Graph Permission as we require it to display user's name in our app. If you want more permission for your app, this is the best time to select it as doing it later may create a challenge when testing your app. Usually any update to the permission will not take effect on any user that has already accepted the app permission and signed in. There is a workaround I use but I think it's not a good approach (hack). So if you know a better way kindly share it in the comment. I will share the hack later.
On command prompt, change to the project directory where you want to use the plugin or create a new project as follow:
on command prompt type: Ionic start msadaldemo blank to create a new project. When it is done, switch to the project folder and install the plugin in the order below:
npm install --save @ionic-native/ms-adal
ionic cordova plugin add cordova-plugin-ms-adal
Note: you may need to open command prompt using Administrator's privilege if you get an error.
If everything is okay, you should get this message "Saved plugin info for "cordova-plugin-ms-adal" to config.xml" and if you check package.json you will see entries for cordova-plugin-ms-adal
Let's create a page name login, this is the page where we will implement our login and when a user is successfully logged in, we will redirect the user to the default home page that was generated during project creation.
Creating login page: type ionic generate page login on the command prompt.
Copy and paste the code below to replace the content of login.html:
Copy and paste the code below to replace the content of home.html:
Note: We will change displayName in the interpolation later. We are just building our pages.
Don't forget to add LoginPage to the entryComponents and declarations arrays in app.module.ts. See the screenshot below

Note: HomePage is added by default.
Now let's dynamically set the root page for our app. Go to app.component.ts and change the value of rootPage from HomePage to any. We will implement a condition here to check if there is a refresh token. If there is, the app redirects to home page otherwise it redirects to the login page. Update the class of app.component.ts thus:
export class MyApp {
rootPage:any;
accessToken: boolean;
constructor(platform: Platform, statusBar: StatusBar, splashScreen: SplashScreen, private auth: AuthServiceProvider) {
platform.ready().then(() => {
// Okay, so the platform is ready and our plugins are available.
// Here you can do any higher level native things you might need.
statusBar.styleDefault();
splashScreen.hide();
});
this.accessToken = localStorage.AppaccessToken == "undefined" || localStorage.AppaccessToken == null;
if (this.accessToken) {
this.rootPage = LoginPage;
}
else {
this.auth.getRefreshedToken().then((result)=>{
this.rootPage=HomePage;
})
}
}
}
Note: you will need to import LoginPage, HomePage and AuthServiceProvider using import statement. I.e.
import{LoginPage} from '../pages/login/login'
import {AuthServiceProvider} from '../providers/authservice/authservice';
import {HomePage} from '../pages/home/home';
When you have done that, save your files and type ionic serve -l on command prompt to view what you have done so far. Our app is taking shape. If you like styling go ahead and put css behind the login page to style it. This post is not about styling so I'm not going to include any css here.
The next thing is to create a provider for our app. The provider will handle authentication and calls to MS graph.
On the command prompt, type ionic generate provider authservice
In the project, open the generated folder and right click on authservice folder, click New File, type config.ts. Then copy and paste the code below inside config.ts:
Replace the application Id with the application Id you saved earlier.
Open authservice.ts and paste the code below inside
Here we have 3 functions: login, getUserProfile and getRefreshedToken. This shows how you will implement the cordova ms adal plugin in ionic. This is where I had a bit of challenge. I spent some time in figuring it out. This is self explanatory, login is called when users hit the login button and getRefreshedToken is called for subsequent access to the app. getRefreshedToken uses acquireTokenSilentAsync to get a refresh token when the current token expires. This prevent the app from prompting the users for credential when the current token expires. getUserprofile on the other hand calls MS graph, giving access to the user's information on office 365.
Note: The cordova MS Adal plugin does not support signing in with Microsoft personal account e.g live, outlook and hotmail. You can only use office or school account. There is a new library that supports personal account, MSAL, but as at the time of this writing, it is not supported in ionic.
We are almost done. Now open login.ts, type import {HomePage } from '../home/home'; at the top of the page. Also import the authservice using import { AuthServiceProvider } from '../../providers/authservice/authservice';
In the constructor, copy and paste public authService: AuthServiceProvider
Then in the export Class LoginPage copy and paste
login() {
this.authService.login().then((result)=>{
this.navCtrl.setRoot(HomePage);
}).catch((err)=>{ console.log("Authentication Falied with the following reason: "+err);});
}
You login.ts should look like:
Open home.ts, copy and paste the code below inside:
Note we have imported our authservice just as we did for login.ts.
Now we need to update the app.module.ts . Open it and paste the following import statements:
import {HttpModule} from '@angular/http';
import {AuthServiceProvider } from '../providers/authservice/authservice'
import { MSAdal } from '@ionic-native/ms-adal';
Put HttpModule in the import array and inlclude AuthServiceProvider, MSAdal in the providers array. Your @NgModule should look like:

Before we test, open home.html and change displayName in the interpolation to responseData.givenName. responseData is the variable that stores the returned JSON object, see home.ts.
Now save your files and run ionic serve -l
If everything works fine, you should see your app loaded but if you click login, nothing happens. This is because you will need an emulator or a device to test cordova native plugins. If you inspect the page, you will this message "Native: tried accessing the MSADAL plugin but Cordova is not available. Make sure to include cordova.js or run in a device/simulator"
So at this point install an emulator, Android or IOS. To install for Android, proceed to developer.android.com to download android studio and set up an emulator. When you have set up an emulator, run the following command: cordova platform add android. This modifies your config.xml and update your package.json file. If you open package.json, you should see android under platforms. If you don't see it, you might have to remove and re-add. To remove use cordova platform rm android.
To test and deploy the app to the emulator or your device run:
Ensure you save all files. then on the command prompt type the following one after the other: ionic cordova build android to build and ionic cordova run android. Note to test on your phone, you must have your phone connected before you run the command, otherwise it opens up in the emulator. If everything works fine you should be able to login with an office or a school account.


Logout:
To implement logout, it is not just enough to clear the localStorage. You have to clear token cache too, otherwise your app will always redirect to the home page. This is because the silent token uses the cache to get a refresh token. It checks the cache for an existing token and then gets a new token if the existing one has expired. Open home.ts and paste the code below inside the class but outside the constructor:
logout(){
localStorage.clear();
let authContext: AuthenticationContext = this.msAdal.createAuthenticationContext('https://login.microsoftonline.com/common');
authContext.tokenCache.clear();
this.navCtrl.setRoot(LoginPage);
}
Note: You will need to import LoginPage. This function clears the localStorage and also the token cache, then sets the root page to login page.
The Hack
I made mention of the approach I use to update graph permission for my test account above. As mentioned, the problem is that when you update the permission after a user has already accepted the initial permission and signed in, that user will not have access to the new resource(s)- permission you added later. That poses a painful challenge for me until i figured this out. So what I do is to load this url below on my browser:
https://login.microsoftonline.com/common/oauth2/authorize?response_type=code&client_id=e9277367d3-a363-4153-ad89-5250cdf6ebd5&resource=https%3A%2F%2Fgraph.microsoft.com&redirect_uri=msa000b17d3-a363-4153-ad89-5250cdf6ebd5%3A%2F%2Fauth&state=YT1odHRwczovL2xvZ2luLm1pY3Jvc29mdG9ubGluZS5jb20vY29tbW9uJnI9aHR0cHM6Ly9ncmFwaC5taWNyb3NvZnQuY29t&x-client-SKU=Android&x-client-Ver=1.12.0&x-client-OS=23&x-client-DM=SM-J510MN&client-request-id=d663d315-4dd1-45ce-bda1-99022bcee9f2&prompt=consent&haschrome=1
You only need to change one thing here, the client id, and ensure prompt=consent. If you like you can change the redirect url but it doesn't matter. once you paste and hit enter, it will take you to the login page, login with the test user and accept the new permission for the user. It takes some time for the update to reflect. You may wait for 10 mins before you test again.
The challenge here is if we later add more permissions to our app, how do we push the updates to all our users. This approach then becomes useless. Please if you know how this should be done, kindly share.
Update:
I noticed a few things you might experience while testing your app, so I decided to write them separately here in case you are experiencing same.
We will build a simple app that allows users to login using their office 365 accounts. Once they login, a personalized welcome message will be displayed to the users using their profile information fetched via MS Graph API.
I decided to blog about my experience because I couldn't come across any comprehensive information on using MS ADAL authentication in Ionic unlike what you get for cordova Facebook and Google plugin. So, I hope this post will help someone.
The first thing to do is to register our app at https://apps.dev.microsoft.com.
Navigate to the url above and sign in with your Microsoft account, It could be a personal account or office account. It doesn't really matter. But if you want to see your apps in your azure dashboard, then use your office account.
Type MS Adal Demo in Application Name field

When you click Create, you should see the page below, select Mobile and Desktop App


In the page that follows, click skip guided setup to go to your app page.
On the app page you should see the generated custom redirect uri in the Native Application section. Copy and save it somewhere, also copy and save the application Id. You can select Implicit flow if you wish, but ensure User.Read is selected under Microsoft Graph Permission as we require it to display user's name in our app. If you want more permission for your app, this is the best time to select it as doing it later may create a challenge when testing your app. Usually any update to the permission will not take effect on any user that has already accepted the app permission and signed in. There is a workaround I use but I think it's not a good approach (hack). So if you know a better way kindly share it in the comment. I will share the hack later.
On command prompt, change to the project directory where you want to use the plugin or create a new project as follow:
on command prompt type: Ionic start msadaldemo blank to create a new project. When it is done, switch to the project folder and install the plugin in the order below:
npm install --save @ionic-native/ms-adal
ionic cordova plugin add cordova-plugin-ms-adal
Note: you may need to open command prompt using Administrator's privilege if you get an error.
If everything is okay, you should get this message "Saved plugin info for "cordova-plugin-ms-adal" to config.xml" and if you check package.json you will see entries for cordova-plugin-ms-adal
Let's create a page name login, this is the page where we will implement our login and when a user is successfully logged in, we will redirect the user to the default home page that was generated during project creation.
Creating login page: type ionic generate page login on the command prompt.
Copy and paste the code below to replace the content of login.html:
Copy and paste the code below to replace the content of home.html:
Note: We will change displayName in the interpolation later. We are just building our pages.
Don't forget to add LoginPage to the entryComponents and declarations arrays in app.module.ts. See the screenshot below
Note: HomePage is added by default.
Now let's dynamically set the root page for our app. Go to app.component.ts and change the value of rootPage from HomePage to any. We will implement a condition here to check if there is a refresh token. If there is, the app redirects to home page otherwise it redirects to the login page. Update the class of app.component.ts thus:
export class MyApp {
rootPage:any;
accessToken: boolean;
constructor(platform: Platform, statusBar: StatusBar, splashScreen: SplashScreen, private auth: AuthServiceProvider) {
platform.ready().then(() => {
// Okay, so the platform is ready and our plugins are available.
// Here you can do any higher level native things you might need.
statusBar.styleDefault();
splashScreen.hide();
});
this.accessToken = localStorage.AppaccessToken == "undefined" || localStorage.AppaccessToken == null;
if (this.accessToken) {
this.rootPage = LoginPage;
}
else {
this.auth.getRefreshedToken().then((result)=>{
this.rootPage=HomePage;
})
}
}
}
Note: you will need to import LoginPage, HomePage and AuthServiceProvider using import statement. I.e.
import{LoginPage} from '../pages/login/login'
import {AuthServiceProvider} from '../providers/authservice/authservice';
import {HomePage} from '../pages/home/home';
When you have done that, save your files and type ionic serve -l on command prompt to view what you have done so far. Our app is taking shape. If you like styling go ahead and put css behind the login page to style it. This post is not about styling so I'm not going to include any css here.
The next thing is to create a provider for our app. The provider will handle authentication and calls to MS graph.
On the command prompt, type ionic generate provider authservice
In the project, open the generated folder and right click on authservice folder, click New File, type config.ts. Then copy and paste the code below inside config.ts:
Replace the application Id with the application Id you saved earlier.
Open authservice.ts and paste the code below inside
Here we have 3 functions: login, getUserProfile and getRefreshedToken. This shows how you will implement the cordova ms adal plugin in ionic. This is where I had a bit of challenge. I spent some time in figuring it out. This is self explanatory, login is called when users hit the login button and getRefreshedToken is called for subsequent access to the app. getRefreshedToken uses acquireTokenSilentAsync to get a refresh token when the current token expires. This prevent the app from prompting the users for credential when the current token expires. getUserprofile on the other hand calls MS graph, giving access to the user's information on office 365.
Note: The cordova MS Adal plugin does not support signing in with Microsoft personal account e.g live, outlook and hotmail. You can only use office or school account. There is a new library that supports personal account, MSAL, but as at the time of this writing, it is not supported in ionic.
We are almost done. Now open login.ts, type import {HomePage } from '../home/home'; at the top of the page. Also import the authservice using import { AuthServiceProvider } from '../../providers/authservice/authservice';
In the constructor, copy and paste public authService: AuthServiceProvider
Then in the export Class LoginPage copy and paste
login() {
this.authService.login().then((result)=>{
this.navCtrl.setRoot(HomePage);
}).catch((err)=>{ console.log("Authentication Falied with the following reason: "+err);});
}
You login.ts should look like:
Open home.ts, copy and paste the code below inside:
Note we have imported our authservice just as we did for login.ts.
Now we need to update the app.module.ts . Open it and paste the following import statements:
import {HttpModule} from '@angular/http';
import {AuthServiceProvider } from '../providers/authservice/authservice'
import { MSAdal } from '@ionic-native/ms-adal';
Put HttpModule in the import array and inlclude AuthServiceProvider, MSAdal in the providers array. Your @NgModule should look like:
Before we test, open home.html and change displayName in the interpolation to responseData.givenName. responseData is the variable that stores the returned JSON object, see home.ts.
Now save your files and run ionic serve -l
If everything works fine, you should see your app loaded but if you click login, nothing happens. This is because you will need an emulator or a device to test cordova native plugins. If you inspect the page, you will this message "Native: tried accessing the MSADAL plugin but Cordova is not available. Make sure to include cordova.js or run in a device/simulator"
So at this point install an emulator, Android or IOS. To install for Android, proceed to developer.android.com to download android studio and set up an emulator. When you have set up an emulator, run the following command: cordova platform add android. This modifies your config.xml and update your package.json file. If you open package.json, you should see android under platforms. If you don't see it, you might have to remove and re-add. To remove use cordova platform rm android.
To test and deploy the app to the emulator or your device run:
Ensure you save all files. then on the command prompt type the following one after the other: ionic cordova build android to build and ionic cordova run android. Note to test on your phone, you must have your phone connected before you run the command, otherwise it opens up in the emulator. If everything works fine you should be able to login with an office or a school account.


Logout:
To implement logout, it is not just enough to clear the localStorage. You have to clear token cache too, otherwise your app will always redirect to the home page. This is because the silent token uses the cache to get a refresh token. It checks the cache for an existing token and then gets a new token if the existing one has expired. Open home.ts and paste the code below inside the class but outside the constructor:
logout(){
localStorage.clear();
let authContext: AuthenticationContext = this.msAdal.createAuthenticationContext('https://login.microsoftonline.com/common');
authContext.tokenCache.clear();
this.navCtrl.setRoot(LoginPage);
}
Note: You will need to import LoginPage. This function clears the localStorage and also the token cache, then sets the root page to login page.
The Hack
I made mention of the approach I use to update graph permission for my test account above. As mentioned, the problem is that when you update the permission after a user has already accepted the initial permission and signed in, that user will not have access to the new resource(s)- permission you added later. That poses a painful challenge for me until i figured this out. So what I do is to load this url below on my browser:
https://login.microsoftonline.com/common/oauth2/authorize?response_type=code&client_id=e9277367d3-a363-4153-ad89-5250cdf6ebd5&resource=https%3A%2F%2Fgraph.microsoft.com&redirect_uri=msa000b17d3-a363-4153-ad89-5250cdf6ebd5%3A%2F%2Fauth&state=YT1odHRwczovL2xvZ2luLm1pY3Jvc29mdG9ubGluZS5jb20vY29tbW9uJnI9aHR0cHM6Ly9ncmFwaC5taWNyb3NvZnQuY29t&x-client-SKU=Android&x-client-Ver=1.12.0&x-client-OS=23&x-client-DM=SM-J510MN&client-request-id=d663d315-4dd1-45ce-bda1-99022bcee9f2&prompt=consent&haschrome=1
You only need to change one thing here, the client id, and ensure prompt=consent. If you like you can change the redirect url but it doesn't matter. once you paste and hit enter, it will take you to the login page, login with the test user and accept the new permission for the user. It takes some time for the update to reflect. You may wait for 10 mins before you test again.
The challenge here is if we later add more permissions to our app, how do we push the updates to all our users. This approach then becomes useless. Please if you know how this should be done, kindly share.
Update:
I noticed a few things you might experience while testing your app, so I decided to write them separately here in case you are experiencing same.
- If you are using android emulator you might be getting "Authentication failed Error: Error in processing code to get token.". I think the problem here is with the version of android running on the emulator or some other incompatible configurations. Try connecting your android phone and run it on it instead. I use Android version 7.1.1. But if you are using your phone, you will need to install and set up adb -Android Debug Bridge to able to debug your app.
- I just noticed that the redirect url is generated in this format msal{applicationId}://auth. So you may not need to use guided setup to generate for subsequent apps, just replace {applicationId} with your app Id.
I hope you find the info here useful. Happy coding.

Could you share the project?. I've had trying it but I had got this error after to write the code.
ReplyDeleteAuthentication Falied with the following reason: TypeError: Cannot read property 'constructor' of undefined.
Note: I'm using ionic 4.2.1
I had the same problem !
DeleteYou need to use "@ionic-native/ms-adal": "^4.15.0" instead of "@ionic-native/ms-adal": "^5.0.0" in your package.json
Hope it helps !
Clearly, It is an engaging article for us which you have provided here about skin care. This is a great resource to enhance knowledge about it. Thank you.
ReplyDeleteBy the way, I have some games for kid like CPL Cricket Tournament sport game or game Archery Blast shooting game and Tanks.io hot game
You can play more games here: Abcya.win | Abcyagames.games
My web site: Abcya game blog | Friv blog game | Miniclip blog for game