Generate Word Document From A SharePoint List Item Using Microsoft Flow
Recently I took a deep dive into Microsoft flow, and the first task I gave myself was using MS flow for one of the projects I have done in the past. In my former company I was tasked by the legal team to develop a solution that auto-generates contract document based on a predefined template and route it for approval. They wanted to standardized the document so that any contract document leaving the bank to the customers will have the same format. I did this without writing a single line of code, using SharePoint Designer Workflow, List and InfoPath I was able to meet their requirements.
Initially doing this in MS flow seemed impossible, but because MS flow has an action that supports REST APIs I was determined to code it if required. But it turns out to be simpler than it seemed. I used a REST API to achieve it though, but later discovered an action that saved me the two steps introduced by the REST API. I will cover the two methods in this post.
We will start by creating a content type and its associated site columns. We will then upload a template to it and apply the content type to a document library. If you have done this before, jump to the part that interests you the most.
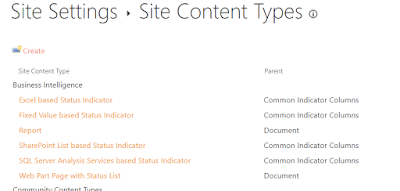
1. Go to the Site Settings (select from the gear icon at the upper right corner on SP online) and click Site content types under Web Designer Galleries.
2. Click Create and name it Contract Agreement.


Initially doing this in MS flow seemed impossible, but because MS flow has an action that supports REST APIs I was determined to code it if required. But it turns out to be simpler than it seemed. I used a REST API to achieve it though, but later discovered an action that saved me the two steps introduced by the REST API. I will cover the two methods in this post.
We will start by creating a content type and its associated site columns. We will then upload a template to it and apply the content type to a document library. If you have done this before, jump to the part that interests you the most.
1. Go to the Site Settings (select from the gear icon at the upper right corner on SP online) and click Site content types under Web Designer Galleries.
2. Click Create and name it Contract Agreement.

3. In the "select content type from" select Document Content Types.
4. Select Document in the Parent Content Type dropdown.
5. Then in the Put this content type into, select New group and type Contract Content Types in the field. I always like to create a new group for my content types.
the page should look like this when you are done:
6. Click Ok to close the page
7. Now look for your content type i.e. Contract Content Types and click Contract Agreement
8. For the purpose of this demo, let's create 3 columns namely Client Name -data type: single line of text, Contractor Name -data type: single line of text and Amount - data type: currency. Choose Add from new site column to create the columns. It should look like this

9. Now create a document library called Contracts based on Microsoft word document template (if you use the advanced options)
10. Now let's apply the content type to the library. Go to the library and click library settings. If you are using SP online, you will find library settings in the gear icon at the upper right corner.
11. On the library settings page, click Advanced settings and click Allow management of content types radio button. Click Ok to go back to library settings.
12. You should now see Content Types category. click Add from existing site content types
13. In the Select site content types from, select Contract Content Types from the dropdown.
14. Select Contract Agreement and click Add to move it to Content types to add box, then click Ok.
Now let's create a custom list that we will use to create content that will be embedded in the generated document.
15. Create a custom list called ContactForm and create these 3 columns: Client Name, Contractor Name and Amount. If you like you can also create a content type with these columns and apply it to the list just as we did for the library. But note, parent content type will be List content type and NOT Document.
Now let's prepare our template. You can download any sample contract (word) document template from the internet and modify it to suit your purpose. But here is one you can use.
If you downloaded my sample, upload it to Contract library, then open it from within the library in word document. See the image below:
16. Click Open in word to open it with word program on your computer.
17. When it is opened, click Insert and select Quick Parts to open the sub-menu.
18. In the sub-menu, click Document Property, then select appropriate column to fill the gaps in the template.
19. When you are done, save a copy on your system drive. Your template should look like this:
20. Now go back to Site content type page. See step 1 on how to navigate there.
21. Look for Contract Content Types, and select Contract Agreement.
22. Click Advanced Settings under Settings.
23. Click Upload a new document template and upload the template above.
24. Leave other settings as default and click Ok.
25. Now go back to the library i.e. Contracts library and click on New. You should see your template in the drop down menu. You may want to make your content type the default and the only content type for the library.

If you click on it, it should open your template with the placeholders in it.
Now it's time to move to Microsoft flow.
1. Open the ContactForm list you created earlier and click on Flow, then Create a flow.
2. In the Create a flow palette, click When a new item is added in SharePoint, complete a custom action.
3. On the page that opens, click Continue, then click Edit in When a new item is created to auto select the current site and the list. Note: Flow is outside of your SharePoint environment, so you may need to sign in if you are not signed in automatically.
4. Click New step and select Add an action.
5. In the Add an action, select SharePoint and search for Get file content, click to add.
6. In the Site Address field, select the site where the library is. Note it allows you to enter a custom site url which means you can use a different site other than the site you are currently working. This is an advantage over SharePoint Designer (SPD).
7. In the File Identifier, click the picker, then select Contracts > Forms > Contract Agreement > ContractAgreement.docx (or whatever you named your template name).
8. Click New step and add Create File, follow the step above to add Create File action.
9. Then select your site, the folder should be the library i.e. Contracts.
10. Set the focus in File Name, then under when a new item is created in the Dynamic Content, select Title, then append .docx to the title. Here we are creating a word document name using the title of our list item.
11. In the File Content, select File Content under Get file content in the Dynamic Content flyout. This action creates a new word document based on the template and copy its content using File Content output. This step should look like this:
with this step you have succeeded in creating a new word document based on the template. But we need to replace the placeholders in the template with the content of our list items.
Like I mentioned before, there are two ways to do this. One will interest developers and the other is lovable to Administrators or power users.
First Method uses Update file properties action and its actually the best method:
12. Add Update file properties action using New step, and configure as follows:
Notice the I have selected ItemId from Create File as Id of the document to update and Name of the document as Title. Note that Title is different from document name in SharePoint library. It is optional so you can leave it empty. But set Client Name, Contractor Name and Amount -these are all selected from when a new item is created category of the Dynamic Content fly-out.
Second Method:
This is the initial approach I used before I discovered the Update file properties action. If you are a developer you will find it interesting to know that Flow functionalities can be extended with REST APIs. But this method introduces another action step: Get file properties.
13. Add a new step and pick Get file properties from Add an action. Note you have to remove Update file properties if you already added it.
14. Configure it as follows:
15. Then add Send an HTTp request to SharePoint action and configure it as follows:
Note: The body has to be in JSON format.
Let's include one last step. Usually you will want to send a contract to a vendor for review before it is finally approved and printed for sign off. MS Flow makes it possible for you to send the generated document as an attachment in an email to the vendor assuming they don't have account created for them on your office 365. So let's add Send email with options step and configure it as follows:
We have two options here: It is Okay, and Review Needed. You can further customize the flow based on the vendor's response. I think is cool if you are looking to automate your contract agreement process back to back.
To finish, click Save to save your changes.
To test, open ContractForm list and fill it
If everything works fine, you should see a new document created in your Contracts library with the name Contractual Agreement or whatever name you used in the title field above. Open it in word to see how the workflow has populated the document with the content from the list. Note: You won't see the changes if you open it in browser. You have to open in word.
I hope you find it helpful.

Hello, I followed your steps but I have an error when the flow try to update the file values: the error is "Item does not exist. It may have been deleted by another user.\r\nclientRequestId: 332f649d-2d6c-42e2-9834-22767653a1c1\r\nserviceRequestId: 2f1c6f9e-70a8-5000-db66-e3775ad1532e" but I don't know what is the reference of "item does not exists": I've seen that the file is created in the document library but the data are not loaded in the file.
ReplyDeleteResolved this issue: I make a mistake to insert the id of the file; I have a second issue: I run first time the flow and it was ok, the other time the flow succeded, the file is creating but the values are empty.
DeleteAre you opening it within browser or word program? If you open it within browser it will be empty. Try opening it in word program on your desktop. It should work...
Deletewhen opening the word document (on my desktop with the word application) from sharepoint the newly created columns do not appear in Quick Parts. is there something else needed to allow Word to 'see' those columns?
ReplyDeleteYou should see it after you have applied the content type on the library. Do this, open an empty word document on your system and go to "save as" on the file menu. Select the library location on your SharePoint site where you have the content type. You should see your your site location if you have opened word from the library before. When you click save, type a name and click save. It should prompt you to select a content type. If it does that means the allow content type is enabled, select the contract agreement content type and save. Then go to Quick Part, you should see the columns.
Deletei got that working but now number 23 (Click Upload a new document template and upload the template above.)does not work. i found this and will try again tomorrow with a new site:
Deletehttps://community.spiceworks.com/topic/2112128-access-denied-when-uploading-a-template-to-a-content-type
If what you are getting is access denied, it might be scripting issue as described on the forum. please let me know if it works for you.
Deletei created a new sharepoint site and went through everything again. i got everything working and the flow runs without issues except the document generated from the flow does not update the 'Quick Parts' tags in the document.
Deletethe second method of your flow isn't described in detail too much but i am going to try that next. method one does not work for me.
If the library where the document gets created at has the custom columns populated by the ContacForm list when the workflow runs, then the Quick Part should not be empty when you open in word program on your desktop. So check the 3 fields i.e. ContractorName, ClientName and Amount on the library if they are not empty. What version of word are you using though? I use 2013...
Deleteok, so sharepoint is generating the document correctly. however the attachment in the email does not send the correct document - it sends the template with the tags not replaced. i have added another 'Get File Contents' step referencing the identifier from the 'Update file properties' step. i am using that 'File Content' as my email attachment and still get the same result ... will continue to troubleshoot ... frustrating - you would think this wouldn't be as complicated
DeleteI'm sure you will figure it out. What version of word are you using though? I use 2016 (not 2013 as erroneously typed above). I'm thinking this could be due to version of word being used with SP Online.
Deletei figured it out - thank you. the confusion was in receiving a copy of the document to a gmail account. the gmail 'view' shows the tags and not the actual values. when you download the document and view in Word the document is correct.
DeleteOh yea, you have to download and open it with word program on your desktop. Glad you figured it out.
Deletegreat instructional document. Do you have any experience with pushing rich text from a list into a word document? I followed your document and was able to get the flow functioning. However, im creating a newsletter and I'd like to give users the ability to submit formatted sections of the document. The flow pushes formatted HTML into the rich text fields in tthe document library.
DeleteIs there any way we could remove the HTML formatting that we get using the multi line rich text fields with tables? It works perfectly fine with multi-line plain text fields.
DeleteHi there.. great blog ! I have followed your instructions above but I have a couple of items in my list that have drop down choices. Is there any way of mapping these to the word document ?
ReplyDeleteAlso my flow fails when adding the information to the word document. Any suggestions ? Thanks Deirdre
This is the error I am getting
Delete"error": {
"code": 502,
"source": "europe-001.azure-apim.net",
"clientRequestId": "d3a646bc-9adb-4c6c-94b6-d48d4a940021",
"message": "BadGateway",
"innerError": {
"status": 500,
"message": "Item does not exist. It may have been deleted by another user.\r\nclientRequestId: d3a646bc-9adb-4c6c-94b6-d48d4a940021\r\nserviceRequestId: 306b849e-6025-6000-3355-3d796f14ab5e"
}
}
I have not actually used drop down for this before. But I think one way around this is to create a a text field i.e. single line of text column in the document library and pass the value of the drop-down field from the custom list into it. So create a text field instead of creating a drop-down field in the document library and use the flow to push value from the drop down in your custom list into it.
DeleteGreat.. I'll try that ! Thank you - Deirdre
DeleteHi Aregbesola,
DeleteThank you for the great post!
I am also facing a similar problem as the below post. When opening the word document on my desktop with the word application from SP and also when opening the attachment sent by email, it does not send the correct document - it sends the template with the tags not replaced.
I am using drop down value and person value (I have a column name Employee and the value is Person) in some of my columns.
I have also tried the solution proposed by you and had created these drop-down field and Person field in the document library as Text Field, however this has not worked.
Is something else I am missing?
I will truly appreciate any suggestion,
Thanks,
Veronica
This was so helpful. How come the word document has to be downloaded though to see the changes?
ReplyDeleteIt's because word online does not support quick part. You can pdf it as someone suggested in the comment below.
DeleteI have been playing with this idea for weeks. Thank you so much for laying it all out! I did find a solution to the "download" problem for sharing the document. Once I create the document, I convert it to an Adobe pdf. This works for me because the document is a regularly published report based off of SharePoint data. Thanks again for the clear and concise walkthrough! You're a lifesaver!
ReplyDeleteThanks for sharing that!
DeleteHow can I convert it to PDF without using a third-party?
DeleteIf data for field in Word Template is empty, then error after opening Word Document.
ReplyDeleteHow to change it?
I'm not sure I understand your question. Are you saying the workflow did not populate the library fields? Empty field in the library shouldn't stop the document from opening...may be something else is wrong with your settings.
DeleteVery useful post.
ReplyDeleteIncredibly helpful post, I'm currently trying to see if i can create all the contents of a word file including tables programmatically and this is a great first step to at least prove i can edit the contents.
ReplyDeleteThis comment has been removed by the author.
ReplyDeleteThis comment has been removed by the author.
DeleteNice Article. Solved my issue. Thanks!
ReplyDeleteThank you! I've been doing this in SharePoint designer for years and this is so helpful in recreating the process in Flow. I was stuck on this for a while and didn't think to use Update File Properties. To prevent the file from being opened in Word Online, in the library settings, I selected the radio option to Open in the client application. This will open the file in Word and he column metadata is displayed when selecting the file (on the right of the screen or from the context menu).
ReplyDeleteThe one issue I ran into was with the content types. I kept getting Access Denied. Then I saw this on TechNet - https://social.technet.microsoft.com/Forums/en-US/9a0dd1e5-62f4-4990-857b-9005a961e76f/access-denied-while-attempting-to-update-content-type-doc-template-or-creating-content-type-policy?forum=onlineservicessharepoint. It appears Access Denied happens on sites created using the Create Site on the main SharePoint page (Office 365 group sites). I ended up creating a site collection using the SharePoint Admin Center.
I had the same when i tried uploading a template to a SITE content type. When i add the contenttype to a document library, i could add the template to the content type there
DeleteThis comment has been removed by a blog administrator.
ReplyDeleteThis comment has been removed by a blog administrator.
ReplyDeleteEvery time I attempt upload the template I get "Sorry you don't have access" even though I have allowed scripting. I am the owner and member of this site collection. I am really starting to hate SharePoint Online.
ReplyDeleteHi Taylor, try what someone suggested above "The one issue I ran into was with the content types. I kept getting Access Denied. Then I saw this on TechNet - https://social.technet.microsoft.com/Forums/en-US/9a0dd1e5-62f4-4990-857b-9005a961e76f/access-denied-while-attempting-to-update-content-type-doc-template-or-creating-content-type-policy?forum=onlineservicessharepoint. It appears Access Denied happens on sites created using the Create Site on the main SharePoint page (Office 365 group sites). I ended up creating a site collection using the SharePoint Admin Center."
DeleteNice article, Thank you it solved my problem.
ReplyDeleteI noticed that if am using a Managed Metadata column that data/value is not fetched in to the word document. other column values like date and time and choice filed, single and multiple line of text people or group all this works, expect the metadata column.
Any Suggestions on this one ?
I haven't tried it with Managed Metadata column yet, so I wouldn't tell for sure if is supported. But did you find the column under Document property when you go to Quick parts in word document? If it is there and you are able to insert it into the template, then I think it should work. Also, have you tried uploading the template into the library with managed metadata, fill up the document properties, then open the template directly from the library? When you open it does the value from the column show up in the template? I will try this myself when I have some time...
DeleteYes, It does show up in Document Property (in Quick Parts). All the column values are getting the information expect for this one. I will try again in a new site collection and see how it goes. Thanks for replying back. :)
DeleteThis is brilliant! thanks Aregbesola :o)
ReplyDeleteHi Aregbesola bro,
ReplyDeleteThat was an amazing article with clear and precise steps. Have been searching for this document generation activity using Microsoft Flow and seriously this is a life saver article.
Keep up the great work bro! Thanks for sharing the wonderful piece of information :)
Great work!!
ReplyDeletei am able to create document in Docu Lib but, i am not getting list content in to that document i received in email
Easy to follow instructions. Thank you. All worked, but the very end. After MS Flow ran and the final document was saved to Contracts, the document did not have a .docx or any file type at the end, so I was unable to open the document. Any ideas why this might have happened?
ReplyDeleteThank you.
You need to manually type in .docx in your flow.
DeleteHi! Thanks for this post. Let say, what if you have a Sharepoint list, where you have two columns: Customer name and Order number and you want to create a document, that contains the customer name and every order number that is related to the customer. Any ways to do that? Thanks
ReplyDeleteThat was an amazing article with clear and precise steps. Have been searching for this document generation activity using Microsoft Flow and seriously this is a life saver article.
ReplyDeletefood games 2019
basketball games
soccer games online
I followed steps and used Method 1, the flow works without errors, a document is created but the fields do not update from Sharepoint list items What should I look for?
ReplyDeleteMore info: Look like the File is created properly in SharePoint, I save them to the same library that the template is stored. If I open the file from Sharepoint seems to only show the template, if I open the file with Word it shows all the fields updated properly. Also the emailed document looks like the template only. Should I save newly created files to another library?
DeleteSo my only issue is the emailed document seems to be the template with document name assigned.
DeleteAlso, opening the document with Word Online from the Document Library shows the template vars but if I download the document and open with Word it is correct.
I also used File name with Extension for Attachments-1 Name in Send Email with Options.
Great post i must say and thanks for the information. Education is definitely a sticky subject. However, is still among the leading topics of our time. I appreciate your post and look forward to more
ReplyDeleteminiclip games unblocked at school, a10 game online, Jogo para criança
Pretty quickly this unique wonderful blog should certainly unquestionably develop into well-known with the different blog nearly everybody, a result of meticulous content pieces and / or review articles or possibly information 2player free
ReplyDeletefriv Games play
jogos io online
I like to read your posts very much. They are so awesome. The articles contain plenty of knowledge and information. They are pieces of advice so that I can solve some problems. Would you mind uploading more posts?
ReplyDeletegame online 2019
jogos friv jogar
jogar jogos online
ReplyDeleteDice Wars
Legends Basketball Stars
Basketball Heroes
After reading your article I was amazed. I know that you explain it very well. And I hope that other readers will also experience how I feel after reading your article.
This is what I was looking for! Thank you so much.
ReplyDeleteIs there any way we could remove the HTML formatting that we get using the multi line rich text fields with tables in flows? It works perfectly fine with multi-line plain text fields
ReplyDeleteHi this article is a great help. the problem is when i go into library settings and click on "Add from existing site content types" , I don't find my group in the list. Any solution to this issue Please.
ReplyDeleteI don't think I've ever found such a well written tutorial that was successful the first time around. I was searching for the ability to create a formatted Word doc from a Sharepoint list for ages (GSuite makes this too easy). The method is incredibly complex but it does work and has opened up a lot more opportunities for Flow in my school. If my brain doesn't explode. Well done and thank you. Brilliant.
ReplyDeleteI have found a much easier way to create Word documents in half as many steps and much less complicated. https://wonderlaura.com/2019/01/09/microsoft-flow-quick-parts/ It may help everyone? It works just as well.
ReplyDeleteThis is really clear and works well. I have one or two questions (mostly about the Word side of things), not sure if this has come up for you before:
ReplyDelete1. I'd like to display a Person Name, Email and Phone from SharePoint. If I use 3 x "Person" columns in SP and select the appropriate display type, the SP library shows the three values (e.g. Harry Smith; 08 5555 5872 hsmith@wherever.com. When I insert these properties into Word, It just shows the person name each time.
2. Some of my property fields are blank in some cases (like Address Line 2 for example). It leaves a visible placeholder in Word (not just a blank). Ideally, I'd not display the line but I'd be happy with just a blank instead of a light grey "[Address Line 2]"
Any comment appreciated, regardless, this is a valuable little tutorial.
So I have resolved item 1 using the Flow Action "Get User Profile (V2)" and text fields in the Doc Library to hold the data
DeleteFirst of all, Thank you so much. I've looking for this for a long time and here I'm.
ReplyDeleteSir, this is working very well with me. the only issue I have is when I enter multi option field. It doesn't populate in the word document. I can transfer single line text but I can't transfer options! What do you think is the issue.
I have not actually used Multiple choice column in my template before but you may want to have a look at this post: http://www.sharepointcorridor.com/2019/12/export-sharepoint-document-library.html. I have used Word Online (Business) actions in Flow (Power Automate) to populate a template. You should be able to adapt the approach described in the post to populate a dropdown content control.
DeleteThanks for replying
DeleteMultiple Choice works fine. You can change the choices either on the list or in the document once it is generated. When writing the flow you select (Choicecolmnname)value from the dynamic content list from the get items section. Hope that makes sense.
DeleteIs it possible to insert picture in the document?
ReplyDeletewas there a resolution for the use-case of rich-text metadata column types?
ReplyDeleteFantastic!! Great instructions and worked perfectly. Thank you
ReplyDeleteMy flow ran successfully, however the document is showing up in the library in an unassigned file format with no populated fields, once I've chosen for it to be opened in Word.
ReplyDeleteThe flow shows that the "update properties" step ran smoothly, but the file doesn't have any information in it.
Any idea why that might be happening?
This might be because you open the document in the browser. Try opening it in desktop client.
DeleteI am also facing the same issue, when i download the document, all values come properly. but when i open the document in browser, values are not coming. what is the soluton for this.
Deletemost of the users will click on the document to open it directly in browsers.
I've got a problem where even if the file type is docx its corrupt, if I change the file type to .doc I can open the file but not have the merge.
ReplyDeleteThanks for taking the time and effort to write this. It saved me days of trial and error!
ReplyDeleteHello Aregbesola,
ReplyDeleteVery interesting your post. I did it easily with SharePoint Designer some time ago, and I didn't know how to do it with Flow (I have SharePoint On-Prem 2016).
I followed your clear instructions, but I have an error on the step, writing the file: "Resource not found" Which could be the reason?
Thanks in advance.
Hello, Thank you so much for your blog and taken time to write out all the steps. I've followed each step and flow is working wonderful.
ReplyDeleteOnly few months pass and now for some reason when ever each response is converted into word, it would add strange code with each responds field in word document.
Do you happen to know why this is happening and how to fix it?
This did work but had some extra steps in it.
DeleteYou might like to try this lady's site which has less steps but still works really well.
https://wonderlaura.com/2019/01/09/microsoft-flow-quick-parts/
Hi,
ReplyDeleteI don´t know what to say, this is exactly what I needed, I haven even simplified it, you are great!!!!
You should add the following tags to your artictle:
"2013 workflow creates blank document"
and connect it somehow to the fact that MS is dissmissing 2010 workflows, and in 2013 workflows there is no way to create a file in a library using a template - it´s a bug!!
I spent a lot of time to find a workaround without the PREMIUM features and it seams you just solved my major issue, as time is running out till 2010 workflows stop.
When I go to step 17 and use quick parts to insert the new columns the new columns do not show up. I will try again and see if I had overlooked anything.
ReplyDeleteI agree with the author, Very nice information and explained
ReplyDeleteStock broker
Best Car exhaust and mufflers specialists in Perth
ReplyDeleteHello, perfect. This was exactly what I was looking for. Very nice and good explained. Now I can integrate sharepoint even more in our daily work here. Thank you very much.
ReplyDeleteAğrı
ReplyDeleteDiyarbakır
Bolu
Elazığ
Siirt
N03
https://titandijital.com.tr/
ReplyDeletemalatya parça eşya taşıma
bilecik parça eşya taşıma
antalya parça eşya taşıma
hakkari parça eşya taşıma
STFKİH
uşak evden eve nakliyat
ReplyDeletebalıkesir evden eve nakliyat
tokat evden eve nakliyat
kayseri evden eve nakliyat
denizli evden eve nakliyat
İO1MİD
025CC
ReplyDeleteTrabzon Evden Eve Nakliyat
Kocaeli Evden Eve Nakliyat
Amasya Evden Eve Nakliyat
Ardahan Lojistik
Kocaeli Lojistik
3F31B
ReplyDeleteKofçaz
İbradi
Çelebi
Avcılar
Nazimiye
Yayladere
Pülmür
Hadim
Yalıhüyük
EC72D
ReplyDeletebingx
kaldıraç nasıl yapılır
bitcoin nasıl kazanılır
canlı sohbet ucretsiz
en eski kripto borsası
en az komisyon alan kripto borsası
en iyi kripto grupları telegram
mobil 4g proxy
btcturk
7D668
ReplyDeletekripto para telegram grupları
filtre kağıdı
probit
telegram kripto para
okex
kripto para haram mı
toptan sabun
papaya meyvesi
probit
022A8BDEBF
ReplyDeletebufalo içecek
cialis
fx15
lifta
sildegra
kamagra
sinegra
vega
kaldırıcı
8F75C6DD55
ReplyDeleteviga
cobra vega
green temptation
viagra
whatsapp ücretli show
vigrande
ücretli şov
yapay kızlık zarı
görüntülü şov whatsapp numarası
A1FD439584
ReplyDeletecam şov
skype show
stag
cam show
whatsapp görüntülü şov
telegram show
canli cam show
ücretli şov
lady era hap
Comprar carta de condução
ReplyDeletethanks for the content,nice blog
60B3A35032
ReplyDeleteYeni Telegram Airdrop Botları
Coin Botları
Telegram Para Kazanma
Telegram Para Kazanma Botları
En İyi Telegram Coin Botları
1C724117F5
ReplyDeleteinstagram yabancı gerçek takipçi
youtube beğeni satın al
güvenilir takipçi
düşmeyen takipçi
bayan takipçi
E3877A1093
ReplyDeletemobil ödeme takipçi al
instagram beğeni satın al
ucuz takipçi
telafili takipçi
instagram takipçi
9B42054A32
ReplyDeleteyeni çıkan mmorpg oyunlar
sms onay siteleri
güvenilir mobil bozum
takipçi satın alma
-
3D3847D89B
ReplyDeleteTakipçi Satın Al
M3u Listesi
Coin Kazanma
Osm Promosyon Kodu
101 Okey Yalla Hediye Kodu
2C83F95D
ReplyDeleteesçort antep
esçort İzmir
esçort van
esçort bayan adıyaman
aksu esçort
aydın esçort
muğla esçort
siirt esçort
esçort bilecik