Calling Microsoft Graph API from an Angular 5 Single Page Application (SPA)
In this post I will be discussing how to use OAuth 2 Implicit Grant to authenticate users with Azure AD and call Microsoft Graph ApI from an Angular 5 Single Page Application. The idea of consuming Microsoft Graph API in an Angular app was prompted by a discussion I had with a contact on LinkedIn recently, asking if I had worked with MS Graph API before, and since I had started learning Angular to broaden my skill set, I decided to create a simple SPA that will authenticate users via Azure AD and display users's profile information using MS Graph API. So if you are looking for how to do that, you are in the right place. I will be sharing my experience with you in this post and I hope you will find this it useful.
I will break this post down into 3 categories:
Since this post is not about angular per se, I will not be going into nitty-gritty of setting up an angular environment. So I will assume you already have your environment set up for Angular CLI. If you need help on that, Google is your friend 😊 . Now let's get started:
Add RouterModule.forRoot(appRoutes) to import: [...] array inside @NgModule..
By now your app.module.ts should look like
We added { path:'', redirectTo: '/login', pathMatch:'full'} code line to redirect users to the login page when they navigate to the root site i.e. http://localhost:4200. We will change this later when we are discussing authorization and authentication.
Your app is taking shape. You can run it to see if everything is fine.
In Visual Studio code, Save all the changes, go to View and click Integrated Terminal. In the Integrated Terminal, type ng serve -o to launch the app. If everything works fine, your app should look like the image below. click on My profile to ensure you can see the page. Note you will have to remove the *ngIf directive in the app.component.html for now so that you can see the navigation. when you are satisfied, add it back.

I will break this post down into 3 categories:
- Creating an Angular 5 Application
- Authenticating and Authorizing your App
- Calling Microsoft Graph API
Creating An Angular 5 Application
Since this post is not about angular per se, I will not be going into nitty-gritty of setting up an angular environment. So I will assume you already have your environment set up for Angular CLI. If you need help on that, Google is your friend 😊 . Now let's get started:
- Change to the directory where you want to create your app.
- Type ng new AngularDemo --skip-tests true to create a folder called AngularDemo for our project. Note that we are skipping the default generated test file because we do not need it. This may take some time, so you can take a walk..
- When it is done, change directory to the new folder you just created i.e. type cd AngularDemo on the command prompt.
- Type code . to open your project in Visual Studio Code or use your preferred code editor.
- Let's create a folder for our components. Open src > app and create a folder called UsersInfo under app. Hint: Create a folder by right-clicking on app folder.
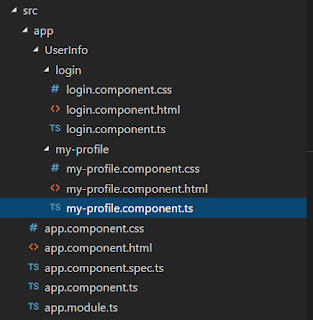
- Now let's create two components. On the command prompt, type ng g c UserInfo/login --spec false --flat true to create login component inside the UserInfo folder. --spec means we don't want test spec file generated and --flat means we want the component created directly under UserInfo folder. This will generate 3 files for you with the following extensions: .html, .css and .ts. Note this command can also create the folder for you if not already created.
- Repeat step 6 to create another component called myProfile.
when you are done, bring up visual studio code, and you should see the two components you created appearing like the image below:

Now let's build our user interfaces by adding html codes to the components. But before that, let's install bootstrap to help style the pages.
- In the same command prompt, type npm install bootstrap@3 --save
- In your project, open angular-cli.json and add "../node_modules/bootstrap/dist/css/bootstrap.min.css" in the styles array. It should look like the image below:

- Open login.component.html, copy and paste the code below inside it: <div><button class="btn-lg btn-primary btn-block" (click)="login()">Sign in with Office 365 Account</button></div>. This is just a button styled with bootstrap.
- Also open my-profile.component.html, copy and paste the code below inside it
- Now let's wire everything in the app component. Open app.component.html, copy and paste the code below inside it to replace its content.
- Next we will create routing for our navigation. open app.module.ts and import RouterModule, Routes and Router.. ie. type (without the quotation mark) "import{RouterModule, Routes, Router} from '@angular/router';" at the top of the page.
- Copy and paste the code below just above @NgModule({...}) in app.module.ts
<table class="table table-striped table-hover">
<thead>
<tr>
<th>Name</th>
<th>Job Title</th>
<th>Email</th>
</tr>
</thead>
<tbody>
<tr>
<td>{{profile.displayName}}</td>
<td>{{profile.jobTitle}}</td>
<td>{{profile.mail}}</td>
</tr>
</tbody>
</table>
<div class="container">
<nav class="navbar navbar-default">
<ul class="nav navbar-nav" *ngIf="getToken">
<li>
<a routerLink="profile">My Profile</a>
</li>
</ul>
</nav>
<router-outlet></router-outlet>
</div>
const appRoutes=[
{path: 'login', component:LoginComponent},
{path:'profile', component:MyProfileComponent }
]
By now your app.module.ts should look like
import { BrowserModule } from '@angular/platform-browser';
import { NgModule } from '@angular/core';
import{RouterModule, Routes, Router} from '@angular/router';
import { AppComponent } from './app.component';
import { LoginComponent } from './UserInfo/login/login.component';
import { MyProfileComponent } from './UserInfo/my-profile/my-profile.component';
const appRoutes=[
{path: 'login', component:LoginComponent},
{path:'profile', component:MyProfileComponent }
{path:'', redirectTo:'/login', pathMatch: 'full' }
]
@NgModule({
declarations: [
AppComponent,
LoginComponent,
MyProfileComponent
],
imports: [
BrowserModule,
RouterModule.forRoot(appRoutes)
],
providers: [],
bootstrap: [AppComponent]
})
export class AppModule { }
Your app is taking shape. You can run it to see if everything is fine.
In Visual Studio code, Save all the changes, go to View and click Integrated Terminal. In the Integrated Terminal, type ng serve -o to launch the app. If everything works fine, your app should look like the image below. click on My profile to ensure you can see the page. Note you will have to remove the *ngIf directive in the app.component.html for now so that you can see the navigation. when you are satisfied, add it back.

This step completes our creating an angular 5 application. Next we will be discussing authenticating and authorizing the app.
Authenticating and Authorizing your App
Now we are getting to the interesting part. The first step here is to register your app on Application Registration Portal.
- Click Add an app, give a name to your application say Angular Demo.
- Click the Create button.
- Click Add Platforms and select Web, make sure Allow Implicit Flow is selected. Allow Implicit Flow allows your app to be authenticated without a need for client secret.
- In the Redirect URLs, type http://localhost:4200.
- Under Delegated Permission, User.Read should be already added, if not, add it. We are using delegated permission because we want our app to access MS Graph API as the currently signed-in user. The other option is used when you don't want user interaction.
- Copy and save the application Id, we will need it later.
- You can set the Logout URL if you want, but this article will not cover that. So leave other settings as default and click Save.
- Create a folder called Services under src.
- Create the following files inside the Services folder: authHelper.ts and appConfig.ts
- Copy and paste the code below inside appConfig.ts
- Copy and paste the code below inside authHelper.ts
Back to Visual Studio Code, now let's create a folder for our service. Services are used in angular for making http call and storing data. So we will create a service for making http request to the authorization server.
export class AppConfig{
public static CLIENT_ID: string ="b0f8efe3-d827-4079-6902-922390bc48f0";
public static TENANT_ID: string = "common";
public static GRAPH_RESOURCE: string = "https://graph.microsoft.com";
}
Change the Client_Id to the application Id that you copied earlier. For Tenant_Id, you can either use common or your tenant id e.g yoursite.onmcrosoft.com. We are using common because we want our app to support multi-tenancy.
import {AppConfig} from './appConfig';
import{Injectable} from '@angular/core';
var accessToken;
var id_token;
var stateResponse;
var cryptObj = window.crypto;
var Sessionstore = sessionStorage.AppaccessToken == 'undefined' || sessionStorage.AppaccessToken == null;
@Injectable()
export class AuthHelper {
constructor(){
if (Sessionstore) {
this.getTokenResponse();
sessionStorage.AppaccessToken=accessToken;
sessionStorage.idToken = id_token;
sessionStorage.respState = stateResponse;
}
}
private getTokenResponse() {
if (location.hash) {
if (location.hash.split('access_token=')) {
accessToken = location.hash.split('access_token=')[1].split('&')[0];
id_token =location.hash.split('id_token=')[1].split('&')[0];
stateResponse =location.hash.split('state=')[1].split('&')[0];
}
}
}
//Generates guid for nonce and state
guid() {
//An array of 8 16-bit unsigned integers
var buf = new Uint16Array(8);
cryptObj.getRandomValues(buf);
function s4(num) {
var ret = num.toString(16); //The number will show as an hexadecimal value
while (ret.length < 4) {
ret = '0' + ret;
}
return ret;
}
return s4(buf[0]) + s4(buf[1]) + '-' + s4(buf[2]) + '-' + s4(buf[3]) + '-' +
s4(buf[4]) + '-' + s4(buf[5]) + s4(buf[6]) + s4(buf[7]);
}
login() {
sessionStorage.nonce = this.guid();
sessionStorage.state = this.guid();
window.location.href = "https://login.microsoftonline.com/"+ AppConfig.TENANT_ID+
"/oauth2/authorize?client_id="+AppConfig.CLIENT_ID+"&response_type=token+id_token
&resource="+ AppConfig.GRAPH_RESOURCE+"&state=" + sessionStorage.state + "
&nonce=" + sessionStorage.nonce + "&redirect_uri=http://localhost:4200";
"/oauth2/authorize?client_id="+AppConfig.CLIENT_ID+"&response_type=token+id_token
&resource="+ AppConfig.GRAPH_RESOURCE+"&state=" + sessionStorage.state + "
&nonce=" + sessionStorage.nonce + "&redirect_uri=http://localhost:4200";
}
}
Now let's wire the login() method to the click event of the login button
- Open login.component.ts, add this import statement to the top of the page: import {AuthHelper} from '../../../Services/authHelper'; then type private authHelper: AuthHelper inside the LoginComponent class but just before the constructor.
- Update the constructor and call the login method as shown below

Before we test our login component, let's add the AuthHelper service in the Provider array of NgModule in the app.module.ts.
Open app.module.ts, add import {AuthHelper} from '../../src/Services/authHelper'; to the top of the page and add AuthHelper to the Providers: [] array.
Now save all the changes and type ng serve -o if your app is not already running.
Click the login button, this should launch the sign-in page, and after signing in, it will ask that you authorize the app to read your profile.
Click Accept. This will redirect you to your app login page. Observe the url, you should see something like #access_token..... You can use fiddler to grab the full response. If you see the access token that means everything is working fine.

Next, instead of redirecting the app to the login page after successful authentication and authorization, we want to redirect it to the profile page i.e. My profile page. But before we do that, we need to validate the claims in the id_token. For this demo, we will only be validating the nonce and state to guide against replay attack. We will check if these values are the same as the values we sent in our request to the authorization server. If they are, we will load the My Profile page but if any of them or both are different, we will return the app back to the home page with an error message in the url. Note, according to open Id specifications, token must be validated before using. For a full list of other token properties that must be validated, see the Open Id specification.
To validate the token, we will use jsrsasign.js library. So let's install and import it in our project
- On the command prompt or Integrated terminal type npm install jsrsasign
- Copy and paste the following import statement at the import section of app.component.ts
- Then copy the code below and replace the AppComponent class i.e. export class AppComponent{......}
- This is self explanatory. We are retrieving nonce and state values stored in the sessionStorage and comparing them against the claims in the token. We are using the jsrsasign library to parse the token claims and retrieve nonce from the token response. Other important token claims to validate are, signing key, audience(aud), and issuer (iss). You can retrieve aud and iss from the token same way i.e. payload.aud and payload.iss respectively. aud should contain your client id according to open Id specification while issuer should look like https://sts.windows.net/{tenant_id}. But for our case, we cannot validate issuer since we are building a multi-tenant application, unless we have a subscription list to check against. Hint: you can decode the token using this tool to see other claims in the token. Lastly we check if the "notValid" expression evaluates to true, if it does, the app returns the user back to the login page and display error, otherwise it takes the user to My profile page where they can see their information.
- Now open app.module.ts and import {HttpModule} from '@angular/http'. Then include HttpModule in the imports:[] and prodivers:[] array of NgModule. It should look like:

- Before we test, let's comment out or remove the line { path:'', redirectTo: '/login', pathMatch:'full'} from appRoute . We don't need it again, we have taken care of this in the app.component.ts. See step 3 and 4 above.
- If your app is not already running, type ng serve -o to run it and test your app.
import { Router } from '@angular/router';
import { AuthHelper } from '../Services/authHelper';
import {KJUR,jws,b64toutf8} from 'jsrsasign/lib/jsrsasign.js';
export class AppComponent {
accessToken;
getToken=sessionStorage.AppaccessToken !="undefined";
constructor(router: Router, auth: AuthHelper) {
this.accessToken = sessionStorage.AppaccessToken;
if (this.accessToken === "undefined") {
router.navigate(["/login"]);
}
else {
var tokenClaims = sessionStorage.idToken.split('.');
var header = KJUR.jws.JWS.readSafeJSONString(b64toutf8(tokenClaims[0]));
var payload = KJUR.jws.JWS.readSafeJSONString(b64toutf8(tokenClaims[1]));
var notValid=sessionStorage.respState !== sessionStorage.state || payload.nonce !==sessionStorage.nonce;
if (notValid) {
window.location.hash = '#error=Invalid_token&error_description=The+id_token+in+the+authorization+response+did+not+match+the+expected+value.+Please+try+signing+in+again.';
console.log(payload.nonce);
sessionStorage.clear();
alert("Error: Inavlid token Id returned!");
return;
}
else {
router.navigate(["/profile"]);
}
}
}
}

if everything is fine, you should be able to login using your office 365 or any Microsoft account and the app should redirect you to My Profile page. We are getting there. The last part is to consume Microsoft Graph API.
Calling Microsoft Graph API
This is the last step. Copy and paste the code below at the import section of my-profile.component.ts.
import {Http, Headers} from '@angular/http';
import {AuthHelper} from '../../../Services/authHelper';
Then copy and replace MyProfileComponent Class i.e. export class MyProfileComponent Implemeny OnInit{.....} with the code below:
export class MyProfileComponent implements OnInit {
profile: object;
constructor(http: Http, auth: AuthHelper) {
http.get("https://graph.microsoft.com/v1.0/me", {
headers: new Headers({ "Authorization": "Bearer " + sessionStorage.AppaccessToken })
})
.subscribe(res => {
if (res.status === 200) {
console.log(res.json());
this.profile = res.json();
}
})
}
ngOnInit() {
}
}
We make a GET request to https://graph.microsoft.com/v1.0/me/ which is the endpoint for user profile, set the bearer token (retrieved from sessionStorage) and parsed the response as JSON object. If you open my-profile.component.ts you will see how we retrieved values from the JSON response using dot notation. You can get more endpoints to play around with at Microsoft Graph Explorer.
Save all the chnages and run the app if not already running. Then click sign in button, you should be redirected to My profile page and see your profile information like this:

Hurrah!! You have successfully authenticated your app and consumed MS Graph API from your angular application. Note you will need to clear the session to be able to get back to the login page. You can do that in your logout method.
References
https://docs.microsoft.com/en-us/outlook/rest/javascript-tutorial
https://docs.microsoft.com/en-us/azure/active-directory/develop/active-directory-token-and-claims
https://docs.microsoft.com/en-us/azure/active-directory/develop/active-directory-protocols-oauth-code
https://docs.microsoft.com/en-us/azure/active-directory/develop/active-directory-devhowto-multi-tenant-overview

I too have implemented similarly using implicit flow only.
ReplyDeleteThis comment has been removed by a blog administrator.
ReplyDeleteThanks for sharing this post.Keep sharing more like this.
ReplyDeleteGuest posting sites
Education
I don’t know what has happened to the custom of delivering consistent good articles. I hope that the custom comes alive after this..thumbs up for your work
ReplyDeleteminiclip online, a10 games online, Jogos para crianças 2019
friv 4 game
ReplyDelete2player games for kids
io jogos for kids
I might suggest almost any information. It really is superb to see you might reveal with text by heart as well as display quality by using precious information is reasonably purely known
I like to read your posts very much. They are so awesome. The articles contain plenty of knowledge and information. They are pieces of advice so that I can solve some problems. Would you mind uploading more posts?
ReplyDeletefree games online
jogos friv 4 school
jogos 360
ReplyDeleteMonopoly .io
Baseball Hero
Football Tricks
I really enjoy simply reading all of your weblogs. Simply wanted to inform you that you have people like me who appreciate your work. Definitely a great post. Hats off to you! The information that you have provided is very helpful.
when Women cease to be handsome, they study to be good. To maintain their Influence over Men, they supply the Diminution of Beauty by an Augmentation of Utility. They learn to do a 1,000 Services small and great, and are the most tender and useful of all Friends when you are sick.
ReplyDeletekizi Games online
free games online
friv 2019
Nice informative blog, it shares more intresting information. This blog is useful to me.
ReplyDeletePHP Training in Bangalore
PHP Training in Chennai
PHP Course in Bangalore
PHP Training Institute in Bangalore
PHP Classes in Bangalore
AWS Training in Bangalore
Data Science Courses in Bangalore
DevOps Training in Bangalore
DOT NET Training in Bangalore
Data Science Course in Chennai
ReplyDeleteReally awesome blog. Your blog is really useful for me. Thanks for sharing this informative blog.
Software Testing Training in Chennai
Software Testing Training in Bangalore
Software Testing Course in Coimbatore
Software Testing Training in Madurai
Software Testing Training Institute in Bangalore
Software Testing Course in Bangalore
Testing Course in Bangalore
Ethical hacking course in bangalore
Friv 4
ReplyDeleteFriv 3
Friv 10000000
Friv 2
Friv 6
Kizi 5
Y8Game
Friv 2
Great information to say the least. I really do appreciate everything so much from this great website.please do keep sharing more blogs like this.
ReplyDeleteIELTS Coaching in chennai
German Classes in Chennai
GRE Coaching Classes in Chennai
TOEFL Coaching in Chennai
spoken english classes in chennai | Communication training
These two ingredients are the key factors to make any Salesforce implementation successful and if they will not be present during your CRM implementation, then it can become a very disappointed IT transformation for the business. Salesforce interview questions and answers
ReplyDeleteThis step completes our creating an angular 5 application. Next we will be discussing authenticating and authorizing the app. pandora bracelet canada , pandora bracelet australia
ReplyDeleteAlong with it also has a live casino 24 hours a day. สมัคร ufa Bet online gambling website is available to play with all casinos, baccarat, slots, roulette, dice and many other card games. We have gathered it here. With many promotions Apply for UEFA Bet now, we are happy to serve you all. With a professional team ready to solve problems And serve all of you There is a team to support the service. And answer your questions 24 hours a day.
ReplyDeleteIf you are looking for a good website, ufa, UEFA BET casino site. Which can be played as a complete solution, able to answer Both in terms of quality and performance that are quite diverse It is best to have a lot of these things.
ReplyDeleteufabet Parent company, the most popular online gambling website, whether it is online football betting Online casinos Baccarat online All of them were not less popular than each other. Become a member of UEFA Bet Playing with the parent company Did not pass agent Bet on a variety of casino games Especially the gambler who likes to Online football betting Our website provides 4 football odds, football betting, a minimum of 10 baht , betting is easy
ReplyDeleteแทงบอล กับ i99CLUB เว็บแทงบอล ที่ตอบโจทย์ให้กับคุณได้อย่างดีเยี่ยมที่สุด เท่าที่จะเป็นไปได้แล้วก็บอกได้เลยว่าการทำเงินตรงจุดนี้ เป็นอีกหนึ่งทางเลือกที่ข้างๆ ที่จะการันตีได้อย่างชัดเจนแล้วว่า เป็นสิ่งที่ดีที่สุดและทรงประสิทธิภาพมากที่สุด เท่าที่จะเป็นไปได้และเชื่อได้เลยว่า มันจะเป็นอีกหนึ่งตัวเลือกที่พร้อมจะเปิดกว้างให้กับคุณได้ อย่างมั่นคงและทรงประสิทธิภาพมากที่สุด
ReplyDeleteGreat Blog with Good Information.
ReplyDeleteStruts Training in Chennai
Struts Training center in Chennai
This is also a very good post which I really enjoyed reading. It is not every day that I have the possibility to see something like this. angular agency
ReplyDeleteThis is a very interesting post about business telephone systems dallas . Your information is very important to me. Thanks for sharing.
ReplyDeleteI examine your blog site presently share great information right below. Sophos Partner Brisbane
ReplyDeleteInstagram Takipçi Satın Al
ReplyDeleteToptan Telefon Kılıfı
Resimli Magnet
Silivri Çatı Ustası
Çerkezköy Çatı Ustası
4X8R8G